หน้าเว็บ

วันอังคารที่ 31 ตุลาคม พ.ศ. 2560

Server HP :: HP Use iLo Port

Server HP :: HP Use iLo Port
1. ต่อสาย Lan เข้า Port iLo ด้านหลังจะมีเขียนว่า iLO และต่อเข้ากับ Switch ที่ต้องการใช้งาน เช่นวง 2
2. Boot เครื่องแล้วกด F10 เพื่อเข้า Config IP และ Password ตามรูป Config IP ไว้แล้วจะแสดง ว่าเข้าผ่าน IP นี้ ตามรูป
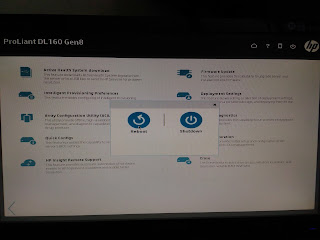
3. เลือก Perform Maintenance ตามรูป
4. เลือก iLO Configuration
5. Menu ด้านซ้าย เลือก Standard Network Settings
แล้วกำหนด IP
6. Menu ด้านซ้าย เลือก User Accounts ตั้ง รหัสผ่าน กด Apply กด Exit
7. Reboot เครื่อง
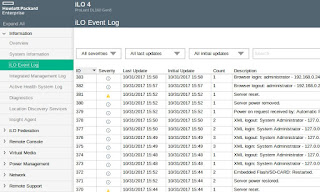
เข้าใช้งาน ใส่ User Name และ Password ที่ตั้งไว้

ไว้ดู Log ดูการทำงานของเครื่อง และ อื่น ๆ

Server HP :: Gen8 Server HP Firmware Update เช่น HP ProLiant DL160 Gen8

Server HP :: Gen8 Server HP Firmware Update เช่น HP ProLiant DL160 Gen8
Gen8 ใช้แผ่นเดียวกัน
Gen9 ใช้แผ่นต่างหาก

สิ่งที่ต้องมี
1. ไฟล์แผ่น Firmware (หาใน Web ยังไม่ได้ ของจาก HP) เขาจะ Upload file แล้วส่ง Link มาให้ ขนาดไฟล์ 5 - 6 G
2. ทำ USB Boot โดยใช้โปรแกรมของ HP
https://support.hpe.com/hpsc/swd/public/detail?swItemId=MTX_360731071b404454b454390208

ขั้นตอน DL160 Gen8
Firmware ณ ปัจจุบัน เป็น วันที่ 12/14/2012
1. Boot Server ด้วย USB กด F11 Boot Menu ตามรูปด้านบน
2. กด 3 เพื่อ Boot เข้า USB
3. เลือก Automatic Firmware Update Version Gen8.0 แล้วกด Enter
4. รอจนกว่าจะ Update เสร็จ Step 1 --> 3


 5. ขึ้นหน้า Please wait, analyzing system.... รอประมาณ 30 นาที ถ้าไม่ Reboot Auto ให้เรา Reboot เครื่องเองเลย

ดูผลการ Update วันที่จะเปลี่ยนไป
08/02/2014


การ Update นี้มีผล Update หลาย ๆ อย่าง ตามรูป

Ubuntu : Ubuntu Image Resize. On terminal

Ubuntu : Ubuntu Image Resize. On terminal
1. Install software
  1. sudo apt-get install imagemagick

2. Use Command. The command mogrify overwrites the original files with the resized images:
  1. mogrify -resize 50% *.jpg      # keep image aspect ratio
  2. mogrify -resize 320x240 *.jpg  # keep image aspect ratio
  3. mogrify -resize 320x240! *.png # don't keep image aspect ratio
  4. mogrify -resize x240 *.png     # don't keep image aspect ratio
  5. mogrify -resize 320x *.png     # don't keep image aspect ratio


https://askubuntu.com/questions/1164/how-to-easily-resize-images-via-command-line

วันจันทร์ที่ 30 ตุลาคม พ.ศ. 2560

Firefox :: How can I make Firefox remember my proxy's username and password?

How can I make Firefox remember my proxy's username and password?
1. Browse to about:config in Firefox
2. Click on "I'll be carefull, I promise!"

3. Search signon.autologin.proxy and network.websocket.enabled in the Search Input Box then change their values as follow:

signon.autologin.proxy=true
network.websocket.enabled=false

4. Restart Firefox, input user name and password for your proxy and click Remember.

https://superuser.com/questions/379160/how-can-i-make-firefox-remember-my-proxys-username-and-password

PfSense : Limit Download Speed IP By PfSense

PfSense : Limit Download Speed IP By PfSense
1. สร้าง Aliases ที่ Firewall --> Aliases

2. สร้าง Traffic Shaper ที่ Firewall --> Traffic Shaper --> Limiters
DownloadLimit , UploadLimit

3. สร้าง Schedules ที่ต้องการให้ทำงาน (ต้องทำเป็นเดือน ต่อเดือนทุกเดือน)
ที่ Firewall --> Schedules เลือกวันทำงาน และตั้งเวลา 8.00 - 11.59, 13.00 - 20.59
4. สร้าง Rules สำหรับใช้งาน ที่ Firewall --> Rules --> Lan
ตั้ง ชื่อ , Source เลือก Aliases ที่ต้องการใช้กับ Rules , Destination เป็น DMZ net , Schedule ที่ตั้งชื่อไว้ , IN/Out Pipe

ต่อไปถ้ามี IP ไหน Download เยอะ ๆ ใช้ Traffice Lan หนัก ๆ ตลอดเวลา ก็ Add เข้า Aliases

https://www.youtube.com/results?search_query=limit+size+bandwidth+per+ip+pfsense+schedule+time

Ubuntu : Ubuntu Server 16.04 /dev/sdb1 Errors

Ubuntu : Ubuntu Server 16.04 /dev/sdb1 Errors
  1.  
  2. *** /dev/sdb1 should be checked for errors ***
  3.  

- reboot แล้วไม่ Check Disk ตามที่ Error

แก้โดย
- Run คำสั่ง
  1. touch /forcefsck


-Edit rcS file
  1. nano /etc/default/rcS

แก้ FSCKFIX จาก No เป็น Yes
FSCKFIX=yes


- Edit /etc/fstab file
  1. nano /etc/fstab

แก้ตัวหลังสุดจาก 0 เป็น 1
-Reboot the system
- แล้วจะมีการ Check Disk ตอนเปิดเครื่อง

เสร็จแล้วแก้ ไฟล์ rcS และ fstab กลับเป็นเหมือนเดิม

https://www.cyberciti.biz/faq/ubuntu-devxvda2-should-be-checked-for-errors/

Ubuntu : Ubuntu Server 16.04 Install Samba Check Status ไม่แสดงชื่อ User ที่เข้ามาใช้งาน มีสีแดงขึ้นแทน

Ubuntu : Ubuntu Server 16.04 Install Samba Check Status ไม่แสดงชื่อ User ที่เข้ามาใช้งาน มีสีแดงขึ้นแทน
ใช้คำสั่ง
  1. /etc/init.d/smbd status
Oct 11 15:57:13 datacenter1 smbd[4894]: [2017/10/11 15:57:13.044034, 0] ../lib/util/become_daemon.c:124(daemon_ready)
Oct 11 15:57:13 datacenter1 smbd[4894]: STATUS=daemon 'smbd' finished starting up and ready to serve connections

แต่ถ้าใช้ไฟล์ smb.conf ของเดิมที่ติดตั้งมากับ samba จะไม่ Error

จึงแก้ไขไฟล์ smb.conf ใหม่ ใช้ตัวอย่างจากไฟล์เดิม แล้วเอา Code เดิม Winbind เพื่อใช้งาน AD
Code เดิม
  1.  
  2. [global]
  3. security = ads
  4. realm = SCI.COM
  5. password server = dc01.sci.com
  6. workgroup = SCI
  7. idmap uid = 10000-20000
  8. idmap gid = 10000-20000
  9. winbind enum users = yes
  10. winbind enum groups = yes
  11. template homedir = /home/%U
  12. template shell = /bin/bash
  13. client use spnego = yes
  14. client ntlmv2 auth = yes
  15. encrypt passwords = yes
  16. winbind use default domain = yes
  17. restrict anonymous = 2
  18. map acl inherit = yes
  19. nt acl support = yes
  20. disable spoolss = yes
  21. wins server = 192.168.0.253
  22.  


Code ใหม่ที่แก้ไข
  1.  
  2. [global]
  3. ## Browsing/Identification ###
  4. workgroup = SCI
  5. server string = %h server (Samba, Ubuntu)
  6. ;   wins server = w.x.y.z
  7.  
  8. #### Networking ####
  9. dns proxy = no
  10. ;   interfaces = 127.0.0.0/8 eth0
  11. ;   bind interfaces only = yes
  12.  
  13. #### Debugging/Accounting ####
  14.    log file = /var/log/samba/log.%m
  15.    max log size = 1000
  16.    syslog = 0
  17.    panic action = /usr/share/samba/panic-action %d
  18.  
  19. ####### Authentication #######
  20.    server role = standalone server
  21.    passdb backend = tdbsam
  22.  
  23.    obey pam restrictions = yes
  24.    unix password sync = yes
  25.    passwd program = /usr/bin/passwd %u
  26.    passwd chat = *Enter\snew\s*\spassword:* %n\n *Retype\snew\s*\spassword:* %n\n *password\supdated\ssuccessfully* .
  27.    pam password change = yes
  28.    map to guest = bad user
  29.  
  30. ########## Domains ###########
  31. ;   logon path = \\%N\profiles\%U
  32. ;   logon drive = H:
  33. ;   logon script = logon.cmd
  34. ; add user script = /usr/sbin/adduser --quiet --disabled-password --gecos "" %u
  35. ; add machine script  = /usr/sbin/useradd -g machines -c "%u machine account" -d /var/lib/samba -s /bin/false %u
  36. ; add group script = /usr/sbin/addgroup --force-badname %g
  37.  
  38. ############ Misc ############
  39. ;   include = /home/samba/etc/smb.conf.%m
  40. ;   idmap uid = 10000-20000
  41. ;   idmap gid = 10000-20000
  42. ;   template shell = /bin/bash
  43. ;   usershare max shares = 100
  44.    usershare allow guests = yes
  45.  
  46. ############ Edit Winbind Login ###############
  47. security = ads
  48. password server = dc01.sci.com
  49. winbind enum users = yes
  50. winbind enum groups = yes
  51. encrypt passwords = yes
  52. winbind use default domain = yes
  53. wins server = 192.168.0.253
  54.