หน้าเว็บ

วันศุกร์ที่ 24 พฤศจิกายน พ.ศ. 2560

Ubuntu : Ubuntu Remote จอใหญ่แล้วต้องเลื่อนจอเอง

Ubuntu : Ubuntu Remote จอใหญ่แล้วต้องเลื่อนจอเอง
เดิมใช้โปรแกรม xtightvncviewer ซึ่งไม่มี Option auto scale จอ

ให้เปลี่ยนไปใช้โปรแกรมใหม่ ชื่อ realvnc
Download ได้ที่
https://www.realvnc.com/en/connect/download/viewer/linux/

- ถอด โปรแกรมเดิมออกก่อน
- ติดตั้งโปรแกรมใหม่
- เรียกใช้ด้วยคำสั่ง vncview เหมือนเดิม
ก็จะเห็นหน้าจอเต็มจอ ถ้าจอใหญ่กว่าเช่น AIO

วันพฤหัสบดีที่ 9 พฤศจิกายน พ.ศ. 2560

PHP : PHP อ่านไฟล์ jpg ใน Folder มาแสดง

PHP : PHP อ่านไฟล์ jpg ใน Folder มาแสดง

  1. $dir = "Ams_Delete/".$DepRun."/";
  2. foreach(glob($dir.'*.jpg') as $file) {
  3.     //print $file . "\n";
  4.     $ShowImage  = $ShowImage."<br><a href=".$file."  target="."_blank"."> <img src=".$file." width="."500"." height="."400"." alt="."Fire!"."></a>";
  5. }


https://stackoverflow.com/questions/8682206/retrieve-the-list-of-alla-jpg-file-of-a-directory

วันอังคารที่ 7 พฤศจิกายน พ.ศ. 2560

Axapta : Axapta Join InventTable แสดงข้อมูลในหน้า Onhand

Axapta : Axapta Join InventTable แสดงข้อมูลในหน้า Onhand
1. ลาก Table InventTable ไปเป็น Data Sources แล้วกำหนด Properties
JoinSource : InventSum
LinkType : InnerJoin
2. แก้ Classes InventDimCtrl_Frm_OnHand
Method : modifyQuery
  1. FormDataSource InventTable_DS
  2. ;
  3. QueryBuildDataSource    qbsInventLookup;
และ Code ส่วนนี้ไว้ล่างสุด
  1.    if(InventTable_DS)
  2.     {
  3.         qbsInventLookup = query.dataSourceName(InventTable_DS.name());
  4.  
  5.         //filter current company language
  6.         /*qbr = SysQuery::findOrCreateRange(qbsInventLookup, fieldnum(TIDInventLookup, LanguageId));
  7.         qbr.value(queryValue(CompanyInfo::languageId()));
  8.         */
  9.         //qbsInventLookup.addGroupByField(fieldNum(SCI_InventSumLookUp, ItemName));
  10.         //qbsInventLookup.addGroupByField(fieldNum(TIDInventLookup,NameAlias));
  11.         //qbsInventLookup.addDataSource(fieldNum(SCI_InventSumLookUp, ItemName));
  12.         qbsInventLookup.orderMode(OrderMode::GROUPBY);
  13.         //qbsInventLookup.addSelectionField(fieldnum(SCI_InventSumLookUp, ItemName));
  14.         qbsInventLookup.addSortField(fieldnum(InventTable, ItemName));
  15.         //qbsInventLookup.addGroupByField(fieldnum(SalesLine,ItemId));
  16.  
  17.     }


3. ที่ Form
Method : executeQuery แก้
  1. element.inventDimSetupObject().modifyQuery(inventSum_DS,inventDim_DS,InventTable_DS);

4. ลาก Field จาก Data Sources InventTable ที่ต้องการแสดงเช่น ItemName ไปใส่ใน Form
 
 
 https://community.dynamics.com/ax/b/hellodax/archive/2015/06/19/join-itemname-from-ecoresproducttranslation-and-search-name-from-inventtable-to-onhand-form-for-search-matter

วันอังคารที่ 31 ตุลาคม พ.ศ. 2560

Server HP :: HP Use iLo Port

Server HP :: HP Use iLo Port
1. ต่อสาย Lan เข้า Port iLo ด้านหลังจะมีเขียนว่า iLO และต่อเข้ากับ Switch ที่ต้องการใช้งาน เช่นวง 2
2. Boot เครื่องแล้วกด F10 เพื่อเข้า Config IP และ Password ตามรูป Config IP ไว้แล้วจะแสดง ว่าเข้าผ่าน IP นี้ ตามรูป
3. เลือก Perform Maintenance ตามรูป
4. เลือก iLO Configuration
5. Menu ด้านซ้าย เลือก Standard Network Settings
แล้วกำหนด IP
6. Menu ด้านซ้าย เลือก User Accounts ตั้ง รหัสผ่าน กด Apply กด Exit
7. Reboot เครื่อง
เข้าใช้งาน ใส่ User Name และ Password ที่ตั้งไว้

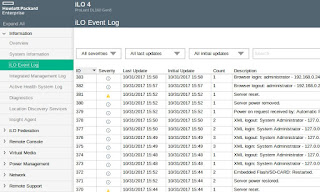
ไว้ดู Log ดูการทำงานของเครื่อง และ อื่น ๆ

Server HP :: Gen8 Server HP Firmware Update เช่น HP ProLiant DL160 Gen8

Server HP :: Gen8 Server HP Firmware Update เช่น HP ProLiant DL160 Gen8
Gen8 ใช้แผ่นเดียวกัน
Gen9 ใช้แผ่นต่างหาก

สิ่งที่ต้องมี
1. ไฟล์แผ่น Firmware (หาใน Web ยังไม่ได้ ของจาก HP) เขาจะ Upload file แล้วส่ง Link มาให้ ขนาดไฟล์ 5 - 6 G
2. ทำ USB Boot โดยใช้โปรแกรมของ HP
https://support.hpe.com/hpsc/swd/public/detail?swItemId=MTX_360731071b404454b454390208

ขั้นตอน DL160 Gen8
Firmware ณ ปัจจุบัน เป็น วันที่ 12/14/2012
1. Boot Server ด้วย USB กด F11 Boot Menu ตามรูปด้านบน
2. กด 3 เพื่อ Boot เข้า USB
3. เลือก Automatic Firmware Update Version Gen8.0 แล้วกด Enter
4. รอจนกว่าจะ Update เสร็จ Step 1 --> 3


 5. ขึ้นหน้า Please wait, analyzing system.... รอประมาณ 30 นาที ถ้าไม่ Reboot Auto ให้เรา Reboot เครื่องเองเลย

ดูผลการ Update วันที่จะเปลี่ยนไป
08/02/2014


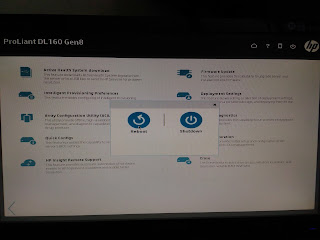
การ Update นี้มีผล Update หลาย ๆ อย่าง ตามรูป

Ubuntu : Ubuntu Image Resize. On terminal

Ubuntu : Ubuntu Image Resize. On terminal
1. Install software
  1. sudo apt-get install imagemagick


2. Use Command. The command mogrify overwrites the original files with the resized images:
  1. mogrify -resize 50% *.jpg      # keep image aspect ratio
  2. mogrify -resize 320x240 *.jpg  # keep image aspect ratio
  3. mogrify -resize 320x240! *.png # don't keep image aspect ratio
  4. mogrify -resize x240 *.png     # don't keep image aspect ratio
  5. mogrify -resize 320x *.png     # don't keep image aspect ratio


https://askubuntu.com/questions/1164/how-to-easily-resize-images-via-command-line

วันจันทร์ที่ 30 ตุลาคม พ.ศ. 2560

Firefox :: How can I make Firefox remember my proxy's username and password?

How can I make Firefox remember my proxy's username and password?
1. Browse to about:config in Firefox
2. Click on "I'll be carefull, I promise!"

3. Search signon.autologin.proxy and network.websocket.enabled in the Search Input Box then change their values as follow:

signon.autologin.proxy=true
network.websocket.enabled=false

4. Restart Firefox, input user name and password for your proxy and click Remember.

https://superuser.com/questions/379160/how-can-i-make-firefox-remember-my-proxys-username-and-password